How to organize your movie collection: from your first movie page to themed selections
There are many ways to collect the films you love: bring together adaptations of one author's work, explore a director's films, save memorable stills or follow an actor's roles. In flickollect, these interests can shape your personal collection.
This guide takes you from adding a movie to exploring a themed selection in Insights. You will build a catalog of films, their creators and characters. You do not need video files: the service stores information about cinema and images, rather than the films themselves.
Before you start
Open the demo collection to explore the service without signing in. To add and edit your own data, sign in and activate a trial or subscription. Editing requires a screen of at least 1920×1080; see the FAQ for supported devices and access conditions.
Start with a few movies that share a theme, such as adaptations of Tolkien's books. You do not have to plan your entire catalog in advance: add information and new themed collections as you go.
1. Add your first movie
Find the movie on IMDb and copy its page address. You can also use the IMDb ID itself: the identifier beginning with tt… in the link.
- In flickollect, go to Collection → Films and click Add.
- Paste the link or IMDb ID and wait for the movie details to be prepared.
- Check the title, year and type, then review the available information on the other tabs.
- Click Save. The service creates the movie and starts adding the selected related data.
The IMDb ID identifies the exact movie, including when several films share a title. Information may come from multiple external sources. Fields for unavailable information can remain empty; you can fill them in later.
Import behavior is controlled in Collection settings. For example, choosing the selection mode for cast import adds a Cast tab where you can select actors and characters before saving. A movie already in your collection will not be added again.
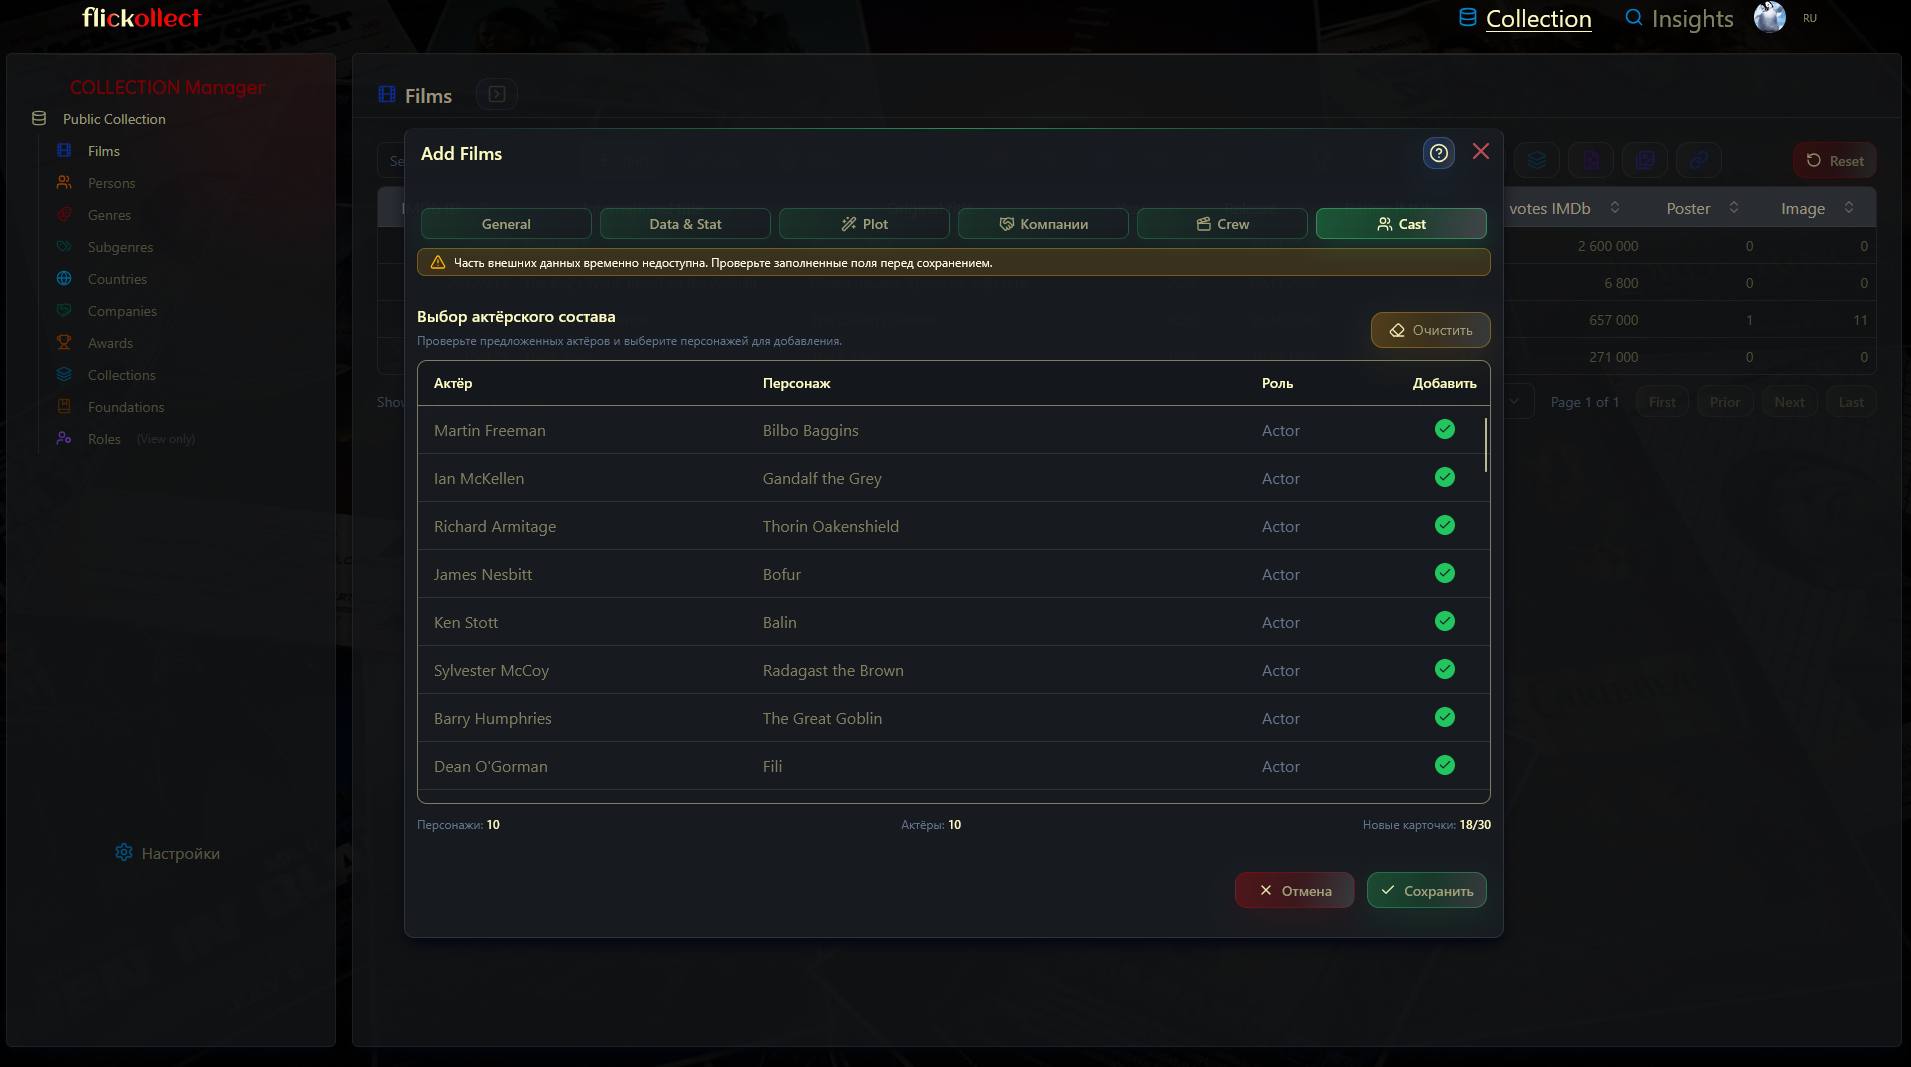
The screenshot shows a warning that some external data is temporarily unavailable. This appears when some information could not be retrieved from external sources. Check the prepared fields before saving. The warning does not prevent you from continuing to add the movie; you can enter missing details later.
2. Customize the movie page
The automatically prepared information is a starting point. Open the movie page and decide what matters to you: a poster, stills, descriptions, details about the creators, awards or useful links.
You do not have to complete everything at once. Start with the basics, then add more detail to your favorite films. Descriptions are editable: shorten the text, correct inaccuracies or replace it with your own.
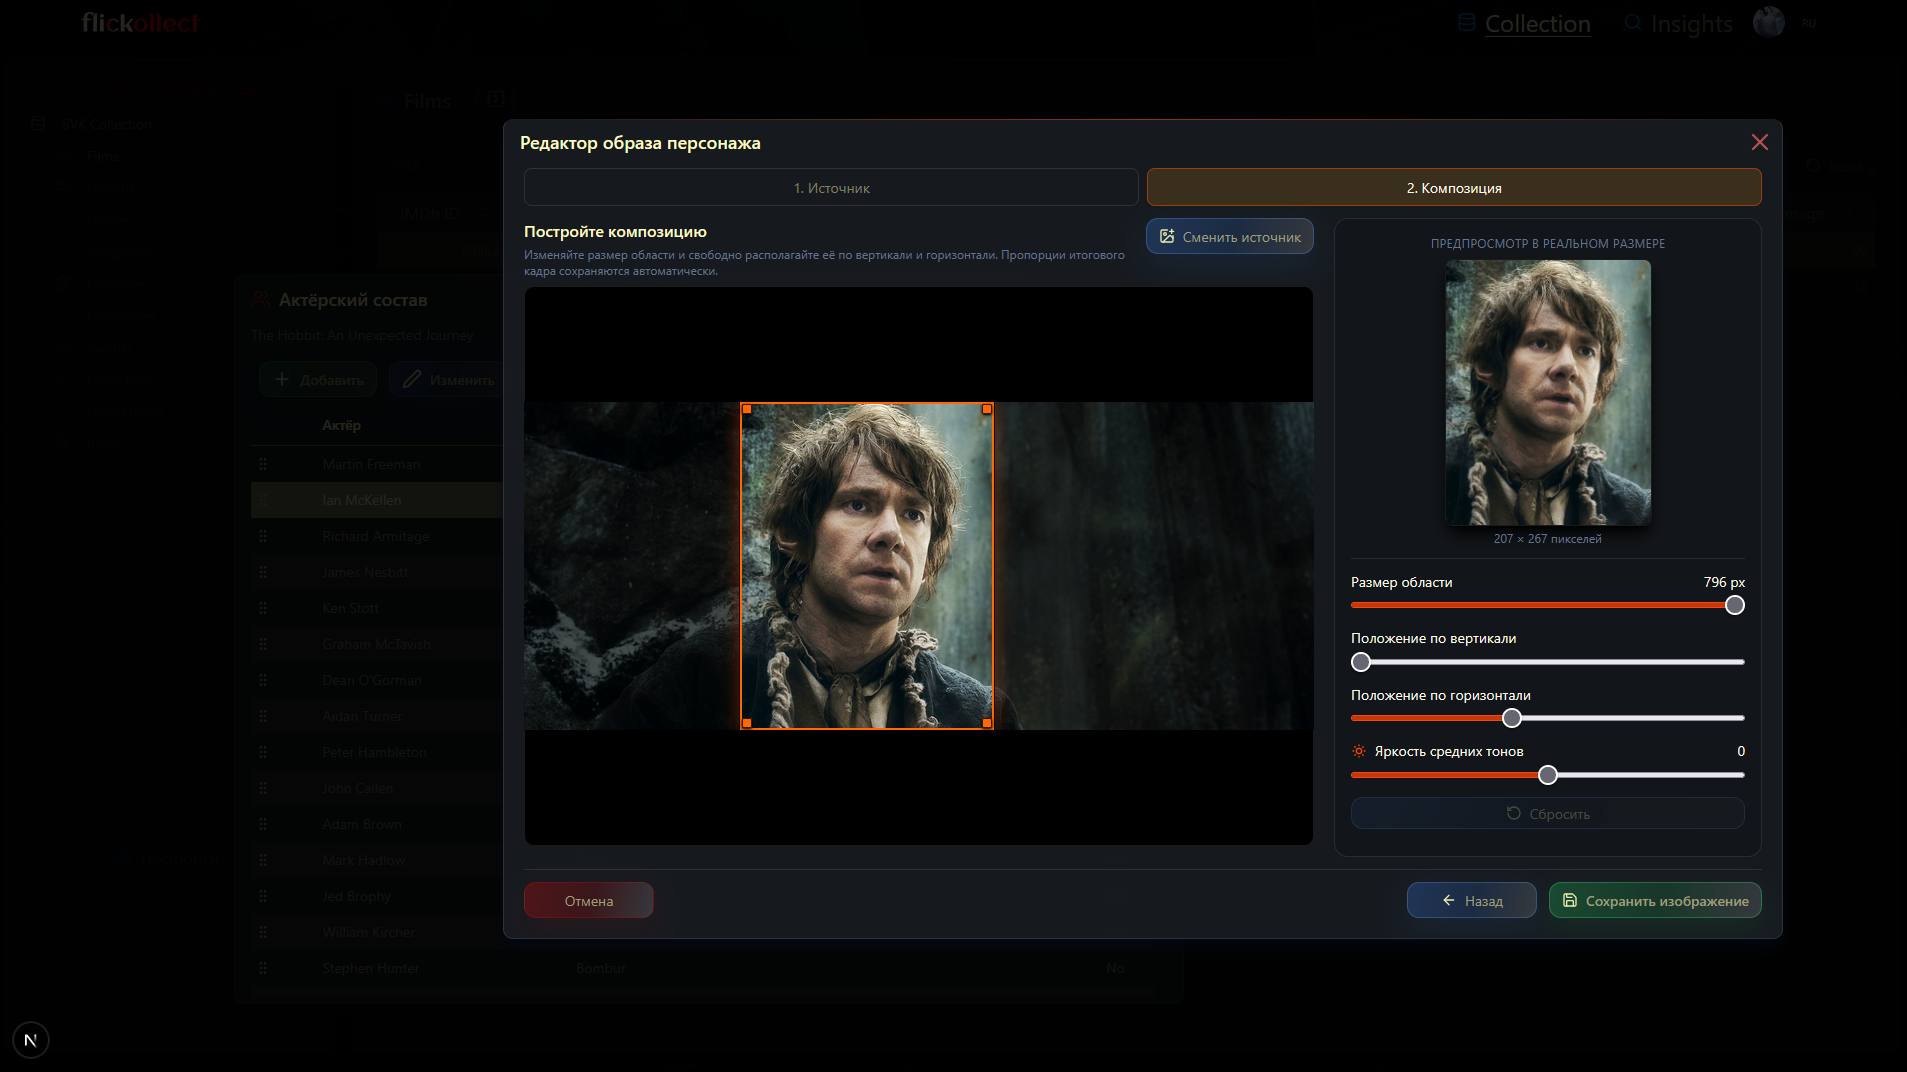
Character portraits deserve special attention. An actor's portrait and their appearance in a particular role are different images. After automatic import, a character may use a copy of the actor's regular portrait; you can replace it with a suitable still.
- In Cast, open the character image editor for the character you want to illustrate.
- Upload a screenshot or promotional still.
- Choose a crop by resizing and moving the frame. Adjust midtone brightness if needed.
- Check the preview and save the image.
3. Group movies around a theme
Genres, countries and directors describe particular aspects of a movie. A themed collection lets you define your own grouping: “Tolkien adaptations”, “German Expressionism” or “Favorite adventure films”.
- In Collections, create a collection with a clear, unique name.
- Open a movie's themed collections editor.
- Find the collection in the left column and move it to the right by dragging it or using the arrow button. The change takes effect immediately.
- Include the other movies in the same way.
A movie can belong to several themed collections. For example, The Fellowship of the Ring can be part of both your Tolkien adaptations and your fantasy collection.
4. Explore your collection in Insights
Open Insights and select Filters. Under the basic movie information, find Collection, keep Include selected and choose your collection from the list. Changes apply immediately: the results show the matching movies from your database.
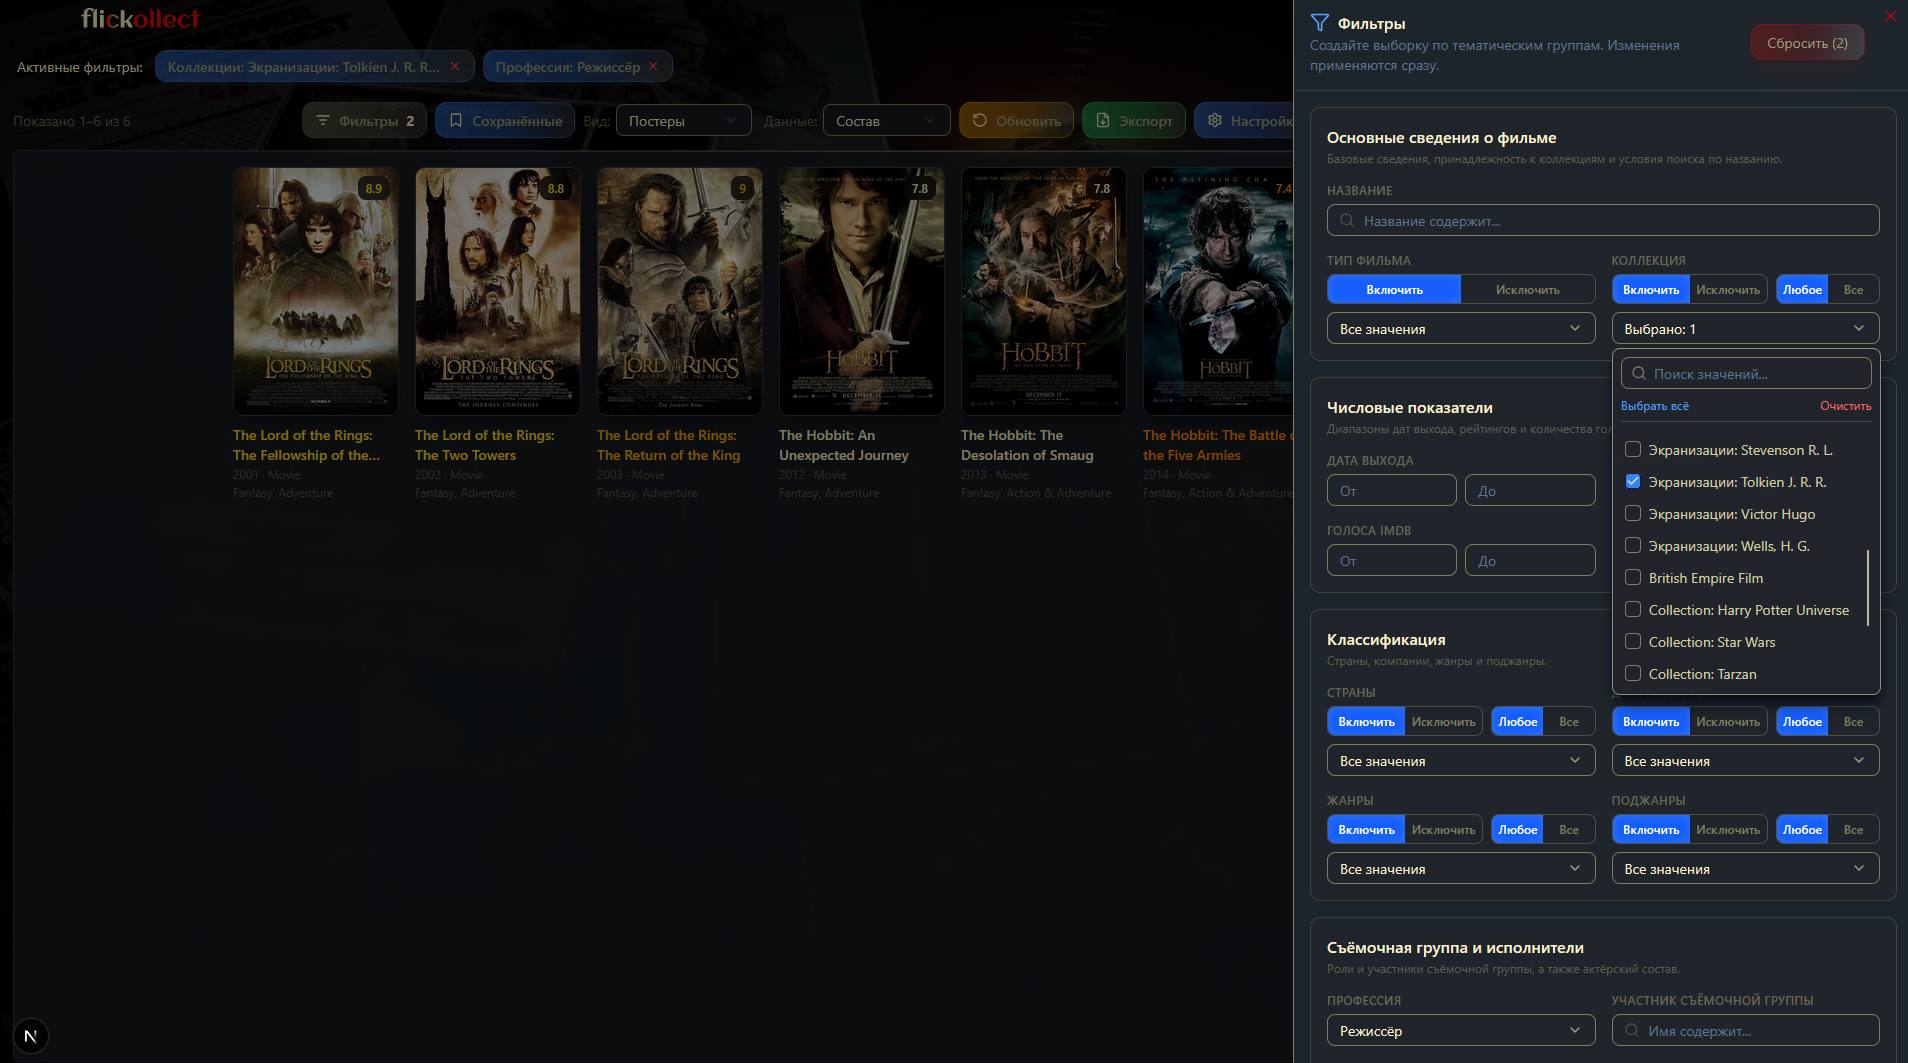
Refine the selection by genre, year, a crew member or another available condition. Selecting a collection in Insights filters the results; it does not change which collections a movie belongs to.
Try different options in View:
- Posters for an overview of the selection.
- Detailed to explore information about each movie.
- Table to compare information and configure sorting.
In table and card views, Data switches between general information, cast and crew, finances and awards. For example, use detailed cards with cast and crew data to see directors and performers.
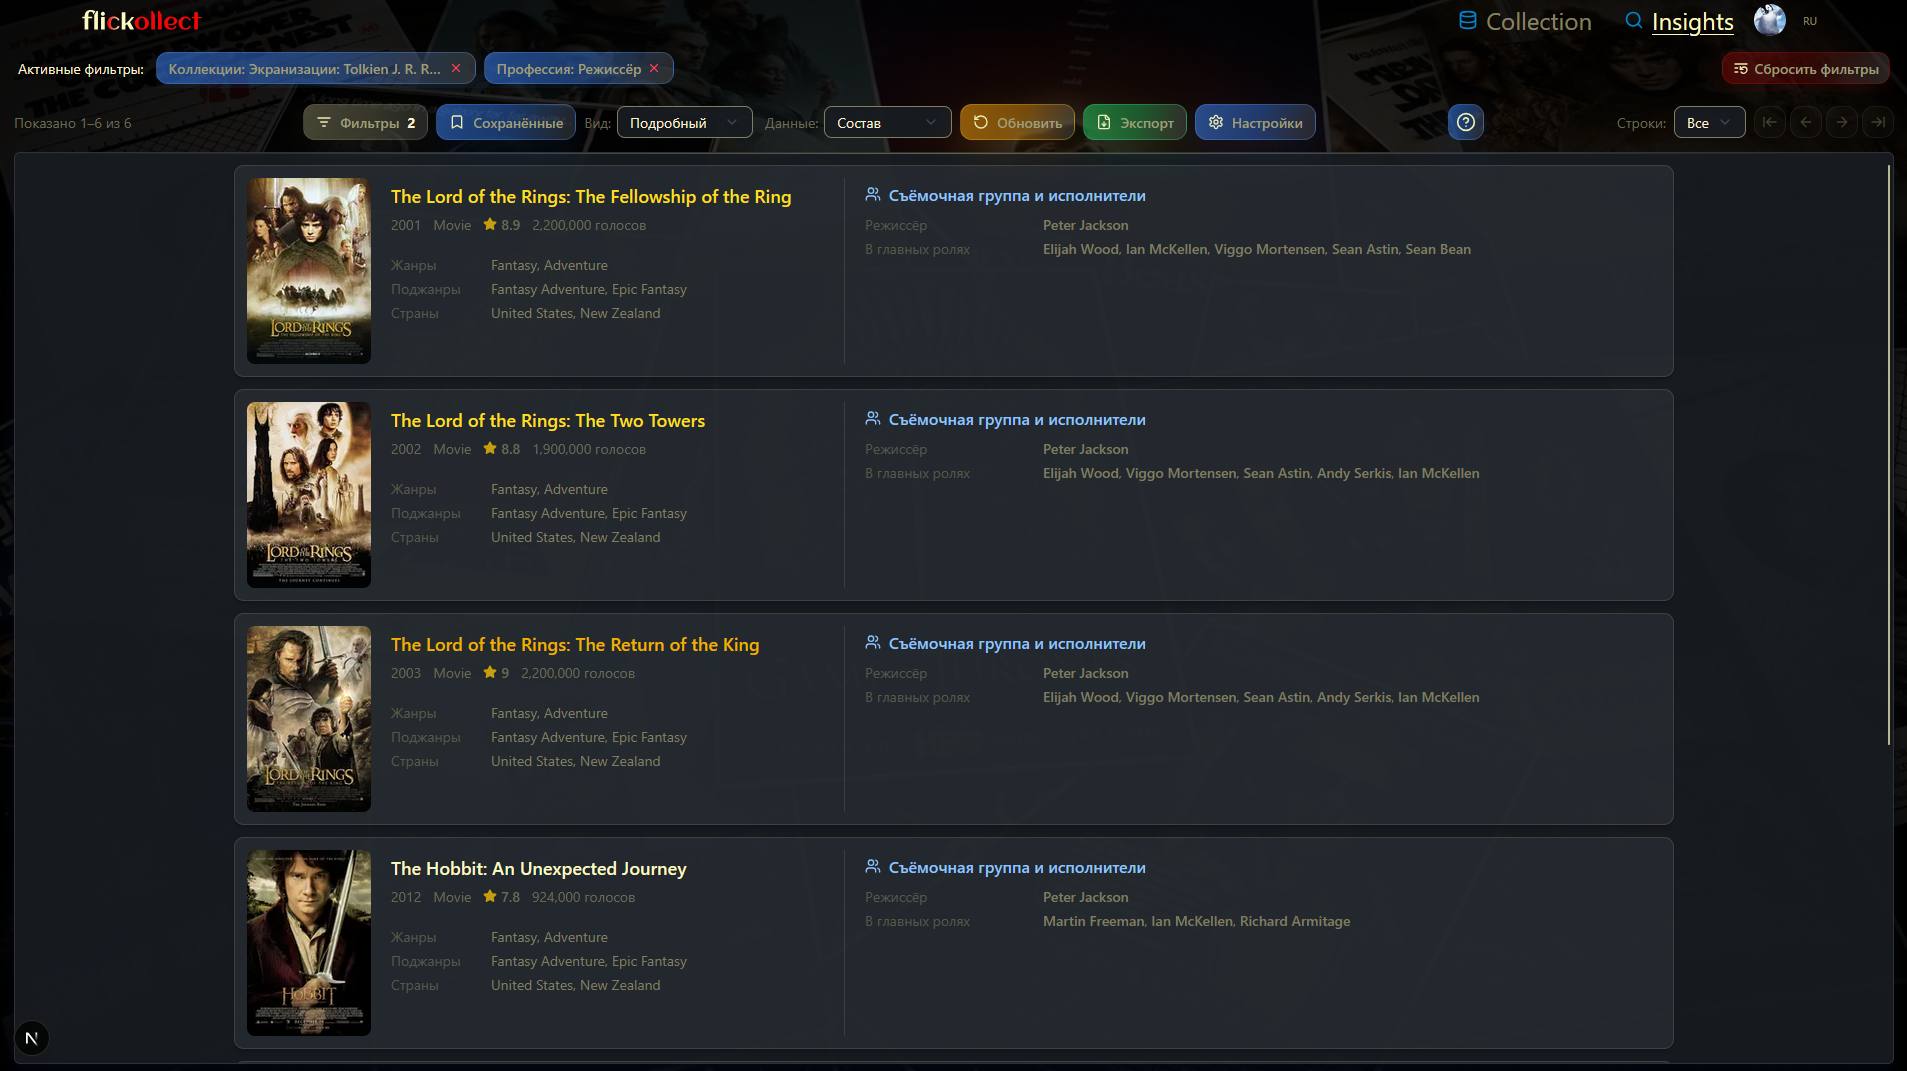
Insights uses the information in your collection. A movie or its awards will not appear in the selection unless the relevant data has been added.
5. Save a useful view
Once the filters and layout are ready, open Saved views, enter a clear name and click Save. For example: “Tolkien — detailed cards”.
A saved view remembers the filters, sorting, view, data set and display settings. Apply it when you want to return to that selection. It saves the selection settings, rather than creating a separate copy of the movies.
To work with the data outside the service, click Export and choose the rows and fields to include. Insights creates an Excel file. This is useful for further work with a table, but does not replace a complete backup of the collection and its images.
Let your collection grow with your interests
You now have a foundation: movie pages, character images and a themed selection you can easily return to. Add more films, expand their details and explore them using other filters.
A small, finished selection is enough to get started. It helps you discover which information and presentation choices matter most for your collection.
See it in action: open the demo collection. Read the features overview to learn more about the service, and the FAQ for the conditions of getting started.